I baked for Elton John
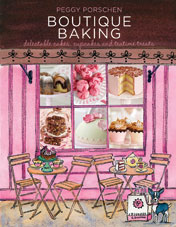
Peggy Porschen is the darling of the showbiz world – she’s baked cakes for Elton John’s White Tie & Tiara Ball and Stella McCartney’s wedding. Other fans of her cakes include Kate Moss, Sting and Gwyneth Paltrow. Recently, her heady reputation in celebrity circles has been enhanced by the launch of a fantastical pink cake shop in London’s Belgravia. Now she has published a book based on the many delights to be found in the Porschen parlour.
So, where did Peggy’s love of cakes and baking come from? ‘As a child growing up in Germany, I was given a cake every year on my birthday,’ she explains. ‘I was passionate about the taste and the look. When I was 14 years old, I decided to make my own.’
Her biggest challenge so far has been the cake for Elton John’s White Tie & Tiara Ball. 
‘It involved creating 550 handcrafted chocolate Fabergé eggs. I worked with more than 1,400 individual pieces of chocolate, which was tricky during a summer heatwave.’
Peggy’s speciality is decorating cakes with sugar flowers. ‘My mother and grandmother were florists, and I must have got it from them,’ she tells me. ‘I also love graphic patterns and designs such as scrolls and swags – they turn a bake into something special.’
Peggy says she finds baking ‘therapeutic. Baking at home reminds me of my family. It’s nostalgic and comforting.’ And though she is famed for her cake-decorating skills, Peggy has a word of warning about getting carried away with appearances. ‘For me, appearance and taste are of equal importance.’
Having sampled a cake or two of Peggy’s, I can promise she follows her own advice.
Boutique Baking by Peggy Porschen (Quadrille Publishing, £20).
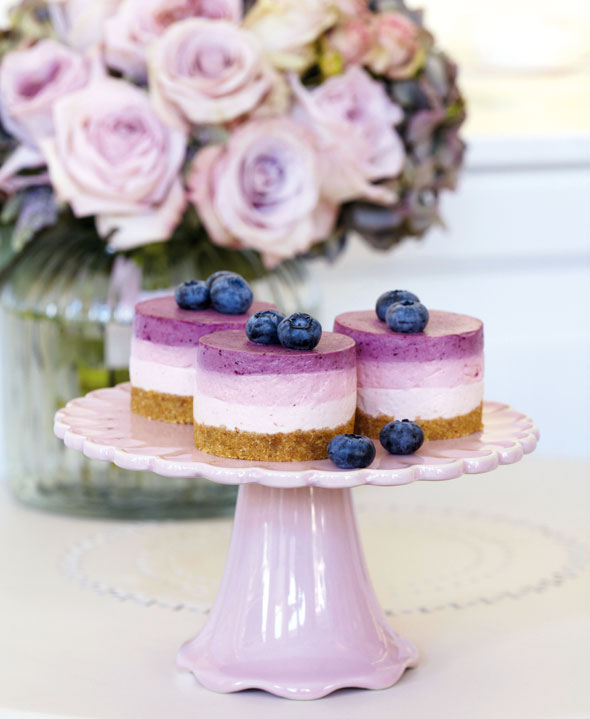
Triple Berry Cheesecakes
These stunning little cheesecakes are very easy to make and taste fabulous. They have a very light texture and consist of layers of strawberry, raspberry and blueberry.
Makes 16 individual cheesecakes
Ingredients
For the biscuit base
- 100g melted butter
- 2 tbsp runny honey
- 200g digestive biscuits, finely crushed
- 1 tsp ground cinnamon
For the cheesecake
- 6 gelatine leaves (I use Supercook Platinum)
- 100ml blueberry purée
- 100ml raspberry purée
- 100ml strawberry purée (if you can’t find berry purées, make your own by puréeing fresh berries in a blender and passing them through a fine sieve)
- 620g full-fat cream cheese
- 185g caster sugar
- 210g crème fraîche 640ml double or whipping cream
Equipment
- Sixteen 5cm (2in) round dessert rings or mousse moulds
- 5cm (2in) deep acetate strips
- Three plastic piping bags
Method
Line the insides of the dessert rings or mousse moulds with the acetate strips.
To make the biscuit base
Melt the butter with the honey in a saucepan. Add the crushed biscuits and cinnamon and mix until combined. Carefully press a tablespoonful of the biscuit mixture into the bottom of each mould, keeping the sides as clean as possible.
To make the cheesecake
Place the gelatine leaves into a bowl and soak them in cold water. Gently warm each of the fruit purées separately, squeeze the water from the gelatine leaves and dissolve two leaves in each of the hot fruit purées. Set aside to cool.
Place the cream cheese and caster sugar in a bowl and mix together until smooth and combined. Then add the crème fraîche. Whip the cream to a soft-peak consistency, taking care not to overwhip.
Divide the cream cheese mixture into three equal parts. Once the fruit purées have cooled to room temperature, mix each one separately with a third of the cream cheese mixture, using a whisk. From this point, you must work quickly as the gelatine can set.
Divide the whipped cream into three equal parts. Gently fold through each of the three cream cheese mixtures until combined.
Starting with strawberry, followed by raspberry and then blueberry, layer the three fruit mixtures in the lined rings or moulds. I find it easier and neater to use piping bags to create the different layers. However, if you do not have piping bags you can carefully spoon the mixtures into the moulds instead.
If using piping bags, fill a plastic piping bag with each mixture. Snip 2.5cm (1in) from the tip of the bag and pipe a layer over the bottom of the biscuit base to about halfway up the sides. Repeat for the two other fruit mixtures until you reach the top.
Flatten the top layers with a palette knife or the back of a spoon. Chill for at least 4 hours or until set.
You can make these cheesecakes up to 3 days in advance if stored in the fridge. De-mould and remove the acetate strips just before serving.
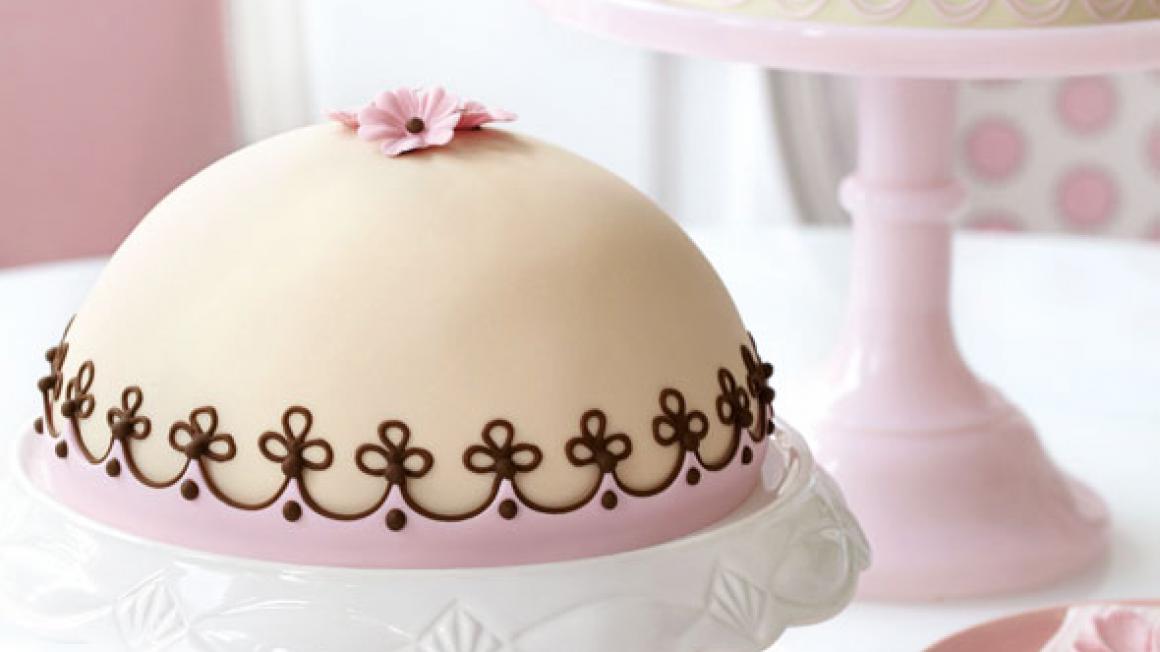
Raspberry & Dome Cake (pictured top)
Made of thin layers of Jaconde sponge filled with purple raspberry and rose jam, vanilla buttercream and fresh raspberries, this is my personal take on the classic Swedish princess cake. It is utterly delicious and perfect for an occasion. It is a delicate cake so keep the decoration simple.
Makes one 15cm (6in) round dome cake, serving 8–12 slices To make two dome cakes, simply double the amounts given below
Ingredients
For the crème patissière
- 75g egg yolks (approximately 3 small egg yolks)
- 125g caster sugar
- 1 vanilla pod
- 500ml whole milk
- 50g cornflour
For the Jaconde sponge
- 3 medium eggs
- 125g icing sugar
- 125g ground almonds
- 3 egg whites
- 15g sugar
- 40g plain flour
For the filling
- 250g unsalted butter, at room temperature
- 1 tbsp Eau de Vie (optional)
- 2 tbsp Peggy’s Purple Raspberry and Rose Jam or any other good-quality raspberry jam
- Punnet of raspberries (approximately 150g)
For the decoration
- 400g marzipan
- 600g white sugar paste
- Brown, green and pink paste food colour
- 1 tsp gum tragacanth
- Small amount of white vegetable fat
- 1 tbsp apricot jam, sieved
- Icing sugar for dusting
- Small amount or clear alcohol, such as vodka or Eau de Vie
- Small amount of royal icing
Equipment
- Two baking trays with a minimum width of 30cm (12in)
- 15cm (6in) sphere mould (I use one half of a ball-shaped cake tin)
- 15cm (6in) round pastry cutter
- Plastic piping bag
- 15cm (6in) round thin cake card
- Paper piping bag
- Small non-stick rolling pin
- Dog rose silicon mould (I use a mould from FPC Sugarcraft)
- Primrose cutter (medium or large)
- Blossom mould (I use a mould from Blossom Sugar Art)
- Egg carton or plastic paint palette with wells
- Piece of ribbon, long enough to cover the circumference of the cake
- Plain round 2.5cm (1in) pastry cutter
This cake has a shelf life of 3 days when stored in the fridge, however the decoration may become soft and sticky in cold humid conditions. Therefore, I recommend making the cake no more than 2 days in advance of serving and consuming it within 1 day.
Method
Preheat the oven to 220°C/gas mark 7. Line two baking trays with baking parchment.
To make the crème patissière
Whisk the egg yolks with the caster sugar in a mixing bowl, then add the cornflour and stir to combine. Place the milk, vanilla seeds and scraped vanilla pod in a saucepan and bring to a bare simmer. Pour about a quarter of the hot milk onto the egg yolk mixture, immediately stirring until smooth.
Return the egg yolk and milk mixture to the pan with the remaining hot milk. Continue cooking until the mixture thickens and bubbles in the centre, stirring well to make sure the crème patissière does not burn on the base of the pan. Taste the crème patissière to check it is cooked; it should not taste floury. The texture should be smooth and thick.
Transfer to a bowl or tray. To prevent a skin from forming, cover tightly with cling film, pressing down firmly to make sure there are no air pockets. Allow to cool and chill until further use.
To make the Jaconde sponge
Beat the whole eggs and icing sugar together until pale and fluffy. Sift together the flour and ground almonds, then gently fold into the egg mixture using a spatula.
In a clean dry bowl, whisk the egg whites with the sugar until they reach soft peaks. Fold the meringue mixture into the batter.
Divide the batter evenly between the two prepared baking trays and level the surface using a palette knife or the back of a spoon.
Bake for 8–10 minutes on a low shelf, depending on your oven. The sponge is cooked when the sides are beginning to shrink away from the edges of the tin and the top is lightly browned and springs back to the touch. Allow to cool outside of the oven but leave the sponges in the baking trays. Once cool, cover with cling film to prevent the sponge sheets from drying out.
To make the buttercream filling
Place the crème patissière in a bowl and beat, adding the softened butter little by little until all the butter is incorporated and the buttercream has thickened. Add the Eau de Vie.
To assemble the cake
Place the sphere mould on top of a small bowl to hold it steady. Line the inside of the mould with clingfilm, overlapping the edges.
Cut out a 30cm (12in) round from one of the sponge sheets. Use it to line the inside of the sphere mould, leaving a small overlap around the outside edge. Trim off any excess using a pair of kitchen scissors.
Fill a piping bag with the buttercream filling. Snip an inch off the tip and pipe a thick layer into the bottom of the cake mould, then place six fresh raspberries evenly over the buttercream. Pipe another layer of buttercream on top. Continue adding layers of buttercream and fresh raspberries until you have almost reached the top edge of the mould. Level off the last layer of buttercream using a palette knife.
Cut out two 15cm (6in) rounds from the remaining sponge sheet using a pastry cutter. Sandwich the two rounds of sponge together with a thin layer of raspberry jam. Place the two sponge rounds on top of the buttercream-filled mould. Spread over a thin layer of buttercream, then place the cake card on top. Trim any excess sponge from around the edges of the mould. Fold the overlapping cling film over the top. Chill for at least 4–6 hours or preferably overnight.
To make the decoration
While your cake is setting in the fridge, make the flower decorations. You can make sugar flowers well in advance and store them for several months in a cool and dry place, but do not store them in an airtight container as the paste may sweat and collapse.
For the mocha-coloured cake, mix 400g sugar paste with brown food colour to a very pale coffee shade. For the green cake, mix 400g sugar paste with green food colour to a pale pastel shade. To prevent it from drying out, keep the sugar paste wrapped in cling film until use.
Mix the remaining sugar paste with a little pink food colour and the gum tragacanth. Add a small amount of white vegetable fat to make the paste smooth and pliable. For the mocha cake, mix only one shade of pale pink. For the green cake, mix a few different shades of pink. Wrap the sugar paste in cling film and allow to rest for 30 minutes in order to firm up a little.
To make the blossoms for the mocha-coloured cake use a the primrose blossom cutter and mould.
To make the dog roses for the green cake, rub a thin layer of vegetable fat into the mould and press a small ball of pink sugar paste into the embossed floral shape. Smooth and flatten the back with your fingers and, if necessary, trim off any excess paste using a small kitchen knife. To release, bend the mould outwards until the flower drops out. Place the sugar flower on a curved surface, for example, inside the wells of a paint palette or an egg carton lined with greaseproof paper, to dry. Make 3–4 flowers in different shades of pink sugar paste using this method.
To decorate
Once the cake has set, remove it from the fridge and turn it out on a sheet of greaseproof paper. Remove the mould and the cling film.
Gently warm the apricot jam and brush a thin layer all over the dome cake.
On a surface dusted with icing sugar, roll the marzipan out to a thickness 3–4mm. It must be large enough to cover the dome. Using a rolling pin, lift the rolled marzipan and lay it over the dome cake. Smooth the marzipan down the sides of the dome using your fingers. Tuck the edges down and trim away any excess marzipan using a kitchen knife.
Splash some clear alcohol onto your hands. Smooth the alcohol over the marzipan-covered dome. This creates an adhesive. Roll out the coloured sugar paste and place over the marzipan the same way. Trim away any excess sugar paste as before.
For the mocha dome cake, use a piece of ribbon to determine the correct circumference of the base of the dome. Using this ribbon as a guide for length and a ruler for depth, roll out a thin strip of the remaining pink sugar paste. Cut a 2.5cm (1in) wide strip that is long enough to go all around the base of the dome. Using a small round cutter, cut out even half-circles from the pink sugar paste strip to create a swag border.
Brush the base of the dome thinly with clear alcohol. Lay the pink sugar paste strip all around it, with the cut-out edge pointing upwards.
Mix the royal icing with brown food colour to make a dark chocolate shade with a soft-peak consistency. Fill a paper piping bag with the icing, snip a small hole from the tip of the bag and pipe a swag border following the edge of the pink icing. Pipe three loops at the highest points of the swags with a dot below. Although not essential, this is best done using a turntable.
To finish, pipe small brown dots into the centre of each pink blossom. Using a tiny amount of royal icing, stick a cluster of three blossoms on the top of the dome.
For the green dome cake, mix the royal icing with pink food colour to make a pale shade with a soft-peak consistency. Fill a paper piping bag with the icing, snip a small hole from the tip of the bag and pipe double swags evenly around the base of the dome and finish with a dot at all the joints. To finish, using a tiny amount of royal icing, stick a few randomly placed dog roses on top of the dome.


